
Introduction
Ever want to use a sound that no one else has? To stand out with unique sounds and tones? You can jam pack your sample library by simply creating one sound and manipulating in multiple ways. Some common reasons why people don’t take this route is simple. They just don’t know how or can’t get it to work properly. While it isn’t my most professional sound, as an example for this tutorial I am going to show you how to render a great audio sample using a half full, or half empty, can of Sprite. You can do this with any sound recording. Try a hand clap, or hitting a nail with a hammer, drop a pen on a table, you get the idea.
Using my phone’s voice recorder I placed the can on a table and literally flicked it with my finger.
Next, I emailed the sound clip to my own email and downloaded it onto my hard drive. I know some phones can render audio in a 3gp format that cannot be imported into most DAWs, I have a solution for that as well. There is an awesome free website that will convert your audio files. No registration required.
Converting your sample into usable .WAV format
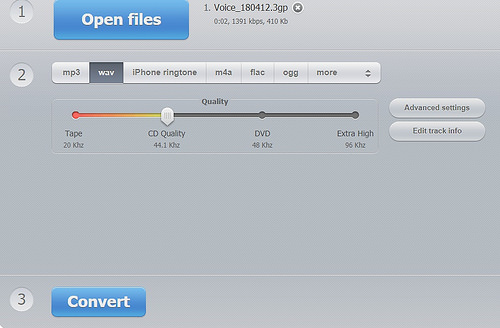
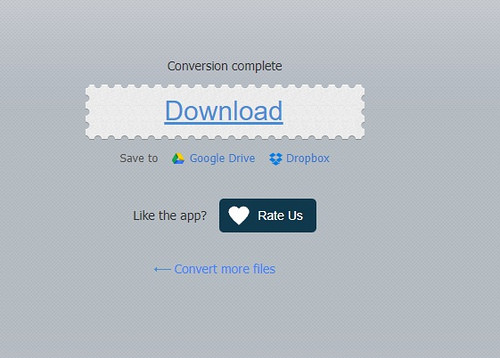
I will now walk you through the steps for converting your sample into a usable .WAV format. This is the screen you will start on.
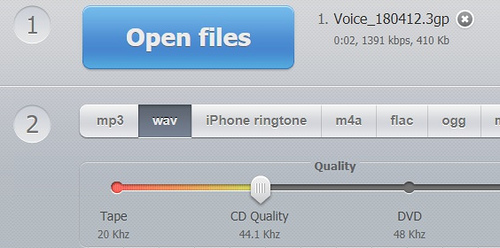

- Select “OPEN” and locate your file.
- Select WAV
- Select “CONVERT”
- Select “DOWNLOAD”


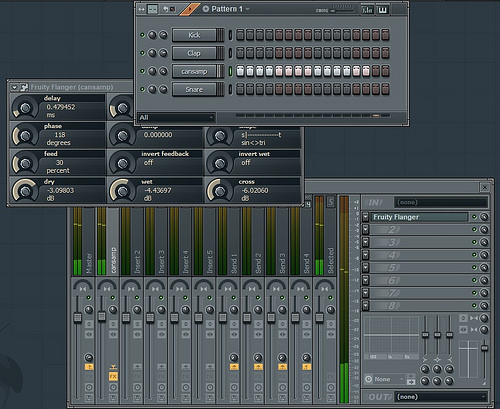
Now go ahead and open your DAW. I am using FLStudio, however, the same things I do can be done with any DAW. Let’s load up our original sound. I have renamed mine to “cansamp”.


I have now loaded up my “can sample”. Now to make it unique I am going to add some delay.


Sounds kinda neat. I can now save that clip.(Don’t worry, I will cover proper rendering at the end.) I will now remove the delay and try something else. A flanger could be interesting.

I have taken my “can sample” and instead of a 1 hit, I made it hit several times then applied the flanger. That could make a really cool intro.
I have removed the flanger and am back with my simple “can sample”. Now I am going to try stacking some effects and see how unique I can make this sound. The great thing about doing it this way is that every effect changes the sound to where it is unrecognizable. Whether you can hear it in use at the time doesn’t matter. You just keep experimenting with different effects and always save it. You never know when the day comes that you are looking for a sound and nothing fits and you scroll through your library and find it within all of the custom samples you created.


As you can see I applied a stack of effects.
I am going to do one more.

Doesn’t sound like someone flicking a Sprite can now does it?
Just to test and verify my samples work I am going to load up all of the sounds I captured and make an audio sample. It isn’t a usable track but you get a good idea of how taking just one sound and manipulating it several ways can give you endless options.
Rendering Loops and Samples
Quick Tip:
Be sure to keep your loops/samples at even bars like 2,4,6,8. (Looping an uneven sample in an even time-based track will be impossible to line up perfectly.)
Now that the sample is almost ready there is one more thing to ensure before we export it.
Volume. Most DAWs have a meter that indicates volume. You want it to be loud, but not clipping. The idea is to be set at Unity Gain. Unity Gain = 0dB. Db = decibels.


The hardest and loudest sound should not exceed 0dB. Go ahead and crank it up, anything above that and you will likely hear distortion, the same sound you hear when someone turns up their stereo too loud and it sounds blown. You want a clean and clear high-quality sample.
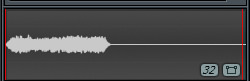
When generating a percussive sound that isn’t sensitive to a specific tempo or BPM what you have is referred to as a “one hit.” The actual sound wave looks like this.

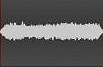
After the sound has come to an end there is a tail of silence. This sound took up 2 bars in a 4 bar measure. To fix this you simply “cut the remainder”.
This will cut the render at the end of the last bar. Once the sound stops, it stops. This can also provide a seamless loop. A sound played over and over with no gaps, pops, or changes when repeating itself.

Other options will be to “leave the remainder” which is good to make sure any post sound effects are still there. If you use a delay and the echo fades away if you were to “cut remainder” you would then lose that after effect. You can also “wrap the remainder” which will take any decaying sounds at the end of a song and put it at the beginning.
Now begins an educational moment on sound quality and formatting.If you don’t know it, it may seem confusing at first but it makes a huge difference. The difference can be heard if you have ever downloaded music from the internet. Depending on who uploaded the song and how they did it determines the sound quality that makes its way to you. Have you ever got a track that the volume was a lot lower than the others? Or ever hear a difference between the downloaded version and the hard disc copy? (I will keep this short and sweet, however, do feel free to research the topic, it gets very in depth.) The first reason for sound differences in audio is dependent upon the format.
Lossless and Lossy
Lossless formats use compression algorithms that preserve audio data so the audio is exactly the same as the original source. The most popular and universal lossless formats are .WAV and FLAC. While the quality is there they are generally larger in size.
Lossy formats have a greater reduction in file size by removing some of the audio information and simplifying the data. This of course results in a reduction in audio quality. MP3 format being the universal example.
Most formats offer a range of degrees of compression, measured as a bit rate. The lower the rate, the smaller the file and the more significant loss of quality.
Remember bit depth and bit rate are not the same thing.
Bit depth is the number of bits of information in each sample.
Bit rate refers to the number of bits transmitted or received per second.
The standard audio CD is 44.1kHz/16. Meaning that the audio data was sampled 44,100 times per second and with a bit depth of 16. Which is what you want to render your samples at. 44.1kHz with a bit depth of 16 in .WAV format.
kHz = kilohertz
44.1 = audio data sampled 44.100 times per second
16 = bit depth
Educational moment over.
We arrive at the point where everything looks good, volume is good, we got rid of any silence, our audio quality is set to be top notch and it is time to hit save.
Making Money Selling Loops
Once you have a library built up did you know you could make money selling those samples and loops? It’s an over-saturated market, however, there are plenty of producers looking for that one sound that is nothing like the redundant others.
First, you need to get organized. The best way to do this is to create 1 folder for loops. Inside that folder create subfolders based on the BPM(Beats Per Minute) of the loop. Not a bad idea to create a folder for one hits that are not tempo sensitive.


I generated an industrial synth and decided to render it complete. Meaning at 80bpm I rendered
A short stab, sustained note, short arpeggiated, and long arpeggiated. I did each of those on every single note. Here is a walkthrough of how it is organized and how I labeled my files.


You want to name the pack something that indicates it’s purpose. I have created PsySamples.
- Labeled Sounds.
- Created a .txt file listing the contents.
- Created a sample track.
- Create cover art.
- Make a .zip file of my sample pack.


Now I am ready to unleash it to the world.
I have chosen the option of selling “royalty free” sample packs. Meaning I charge a one time fee for the pack and its content. The buyer can use them however they want without paying royalties. There are websites out there that will give you an exclusive or non-exclusive licensing deal to host your packs and some offer royalties under certain terms of usage. I chose a quick, cheap, easy way to D.I.Y.
Free Website. There are so many out there. They offer easy to use templates so you don’t even need to know how to code. Just drag and drop.
Then head on over to PayPal and register your free account so you can receive payments.
And last you need a site that will sell digital downloads. A lot of these kinds of websites will want you to pay a fee and then charge you monthly. However, if you are trying to do this on a budget there are websites that take a percentage of your sale. So if you sell nothing, you pay nothing. The best one I have found is My Minto.
The percentage scale looks like this:
- If you sell less than $25 per month / no charge
- If you sell more than $25 per month / 2.5% transaction fee
Included: Free Store Widget & Free Mobile Store
All you do is copy the “Buy now” code they provide and paste it into your website. When someone selects it, the website gets payment, payment drops into your PayPal, and the buyer gets a link to their digital download. Simple as that.
Conclusion
By reading this tutorial you now have the ability to :
- Create your own sound sample.
- Convert it and import it into your DAW.
- Manipulate and mix the sound.
- Render and export a quality audio “one hit” or “seamless loop”.
- Create a loop library.
- Create and package a sample pack.
- Build a website, create a storefront, and accept payments to sell your sample pack.
While the examples I have given are not the only ones that exist I encourage you to explore and find the best option that suits you and also come back and share any good finds in the comment section below.